Netvoyager Thin Client Firmware Centre
Thin Client Rescue Disk
Overview
Very rarely, Netvoyager thin clients fail, and this generally occurs when the administrator is updating the firmware and there was an interruption during the update process. If this happens, this would lead to the thin client failing to boot. Netvoyager has devised a mechanism to allow the administrator to create a USB Drive Rescue Disk, to re-flash the firmware on to the device, returning it to a known operational state.
Requirements
- USB Pen Drive with a minimum capacity of 256MB (NOTE: all data will be destroyed on this pen drive when creating the rescue disk)
- PC with windows XP or Linux installed
- Network and Internet connection
- The failed thin client (take note of the model)
Important Warnings
1 - The upgrade is about 120MB and the process could take up to 20
minutes depending your internet connection
2 - All programs and data will be destroyed and replaced with the new
firmware (both on the USB and thin client)
3 - Lithium configuration files are not compatible with PhoenixOS
configuration files and visa-versa
4 - If the upgrade fails, it will render your thin client unusable, you
will then to repeat the process
The Creation Process
Windows OS (XP SP2)
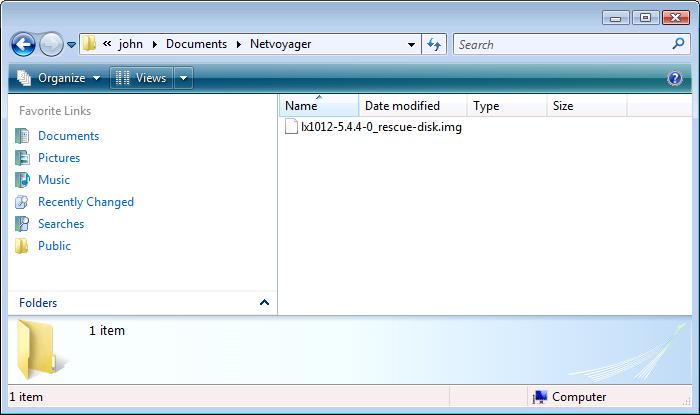
- Download the Netvoyager Image file (.img).
- Download the correct .img file for your thin client as listed
below (e.g. lx1012-5.4.4-0_rescue-disk.img for the LX1012) to a
temporary folder on your XP/Vista computer. Ensure you use "Save File"
and not "Open File" so that the file is saved into your file system in
a similar way to the screen shot shows below.
- Check that the .img file has downloaded without errors:
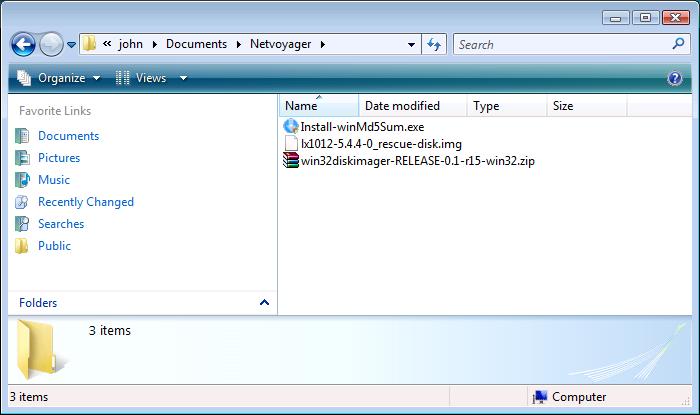
- If you don't already have it installed download the winMd5Sum checksum software "Install-winMd5Sum.exe" into the same folder you downloaded the thin client image. Ensure you use "Save File" and not "Open File" so that the file is saved into your file system in a similar way to the screen shot shows below.
- Install accepting the default options. On Vista you may get a
warning that the software has not installed correctly and need to
confirm that it has anyway.
- To check that your .img file has downloaded without errors right click on the Netvoyager .img file and select the "Send To" menu item and then "winMd5Sum".
- Wait for winMD5Sum to load and finish the checksum (this may take some time depending on the performance of your computer).
- The "MD5 Sum" will be displayed and should match the MD5 Hash/Sum listed with the .img file.

- An automated compare is available. To use this copy and paste the MD5 Hash/Sum listed with the .img file below into the "Compare" field and click the "Compare" button.
- If the checksum is different you need to download the .img file again and check again. If the checksum is the same you are ready to proceed.
- Click on "Exit" to quit winMd5Sum.
- Copy the .img file to a USB drive.
- If you don't already have it installed download the disk imaging software (by author) for windows. Ensure you use "Save File" and not "Open File" so that the file is saved into your file system in a similar way to the screen shot above.
- Unzip all files in the .zip file into the same folder that you downloaded the thin client image into.
- Insert the USB drive which is to become the rescue image. If
Windows Explorer opens a window to show the USB drive close the window.
- Run the disk imager application (e.g. double click on
Win32DiskImager.exe). If asked to "cancel" or "allow" the program to
run, select "allow".
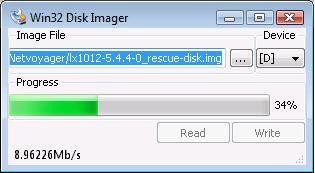
- Under "Image File" click on the "..." button. Browse to the .img file, highlight it and click "Save".
- Under "Device" select the USB drive letter to use. Normal this will be the correct drive letter for your USB drive by default. e.g. "[D]".
- Click on the write button and watch the progress bar.
- Once the disk imager completes, wait for a few seconds and ensure your USB device is no longer being written to (e.g. no flashing LED).
- Close the disk imager by clicking on the top right hand "X".
- Unplug the USB drive WITHOUT using the Windows "Safely Remove Hardware" facilities.
- You are now ready to use the USB drive to restore PhoenixOS to
your Netvoyager thin clients.
Linux OS
- Download the correct .img file for your thin client
- Insert the USB pen drive to copy to
- Open a terminal and use mount to determine the device name (e.g. /dev/sdb1)
- WARNING: make sure you use the correct name otherwise you could erase your hard disk!
- You need to be a user with administrator rights
- Unmount any auto mounted drives caused by plugging in the pen
- Copy image to USB pen drive
sudo dd if=rescue_drive.img of=/dev/sdb
- This should only take a couple of minutes at most.
Install OS
LX1021
- During BIOS initialisation press F12 and select USB-ZIP
- Once device has booted click once on the "restore phoenix os" icon
- a terminal will open
- when terminal closes the unit can be rebooted into phoenix.
LX1010
- During BIOS initialisation press F11 and select USB pen drive
- Once device has booted click once on the "restore phoenix os" icon
- a terminal will open
- when terminal closes the unit can be rebooted into phoenix.
Rescue Image Files
| Model | Version & Link | Details |
| LX1000 | 5.1.0-1228 | File Size: 246MB
MD5 Hash: eb18ae9acceb98105cb3f6ba69272720 |
| LX1010 | 5.4.1-0 | File Size: 250MB MD5 Hash: bc1fbaa45de0bfe0e40001944be6a99e |
| LX1012 | 5.4.4-0 | File Size: 250MB MD5 Hash: 5f0c6cff722298ddd0464c6a6614b186 12 May 2010 - Inititial lx1012 release. |
| LX1021 | 5.4.1-0 | File Size: 250MB MD5 Hash: 9f929f17d53cf0fd16e6b8103a1551a4 (* Only Available for LX1021 [rev TC3590]. If used with a different hardware revision, it will damage the unit *) |
| LX1022 | 5.4.1-1 | File Size: 250MB MD5 Hash: 82c2f6b3e1bcc3f81b094cb69a92d912 |
| LX1022 | 5.4.3-1 | File Size: 250MB MD5 Hash: ddfdadc329092333662ec4f86dcf71b7 12 May 2010 - Added Wifi support, Netvoyager brand updates. |
| LX1032 & LX1032CW | 5.4.3-1 | File Size: 250MB MD5 Hash: 94a97ef4f642f24cd50a1a0af003ccd0 |
| XP1022 | 1.02 | File Size: 858MB To request download details please email technical support: support@netvoyager.co.uk |
| XP1032 | 1.02 | File Size: 858MB To request download details please email technical support: support@netvoyager.co.uk |